Networks
The Networks page shows every Nebula network you can access as a grid of square cards, and lets you create networks. Each network has a name and a subnet (CIDR) used for IP allocation to nodes.
| Light | Dark |
|---|---|
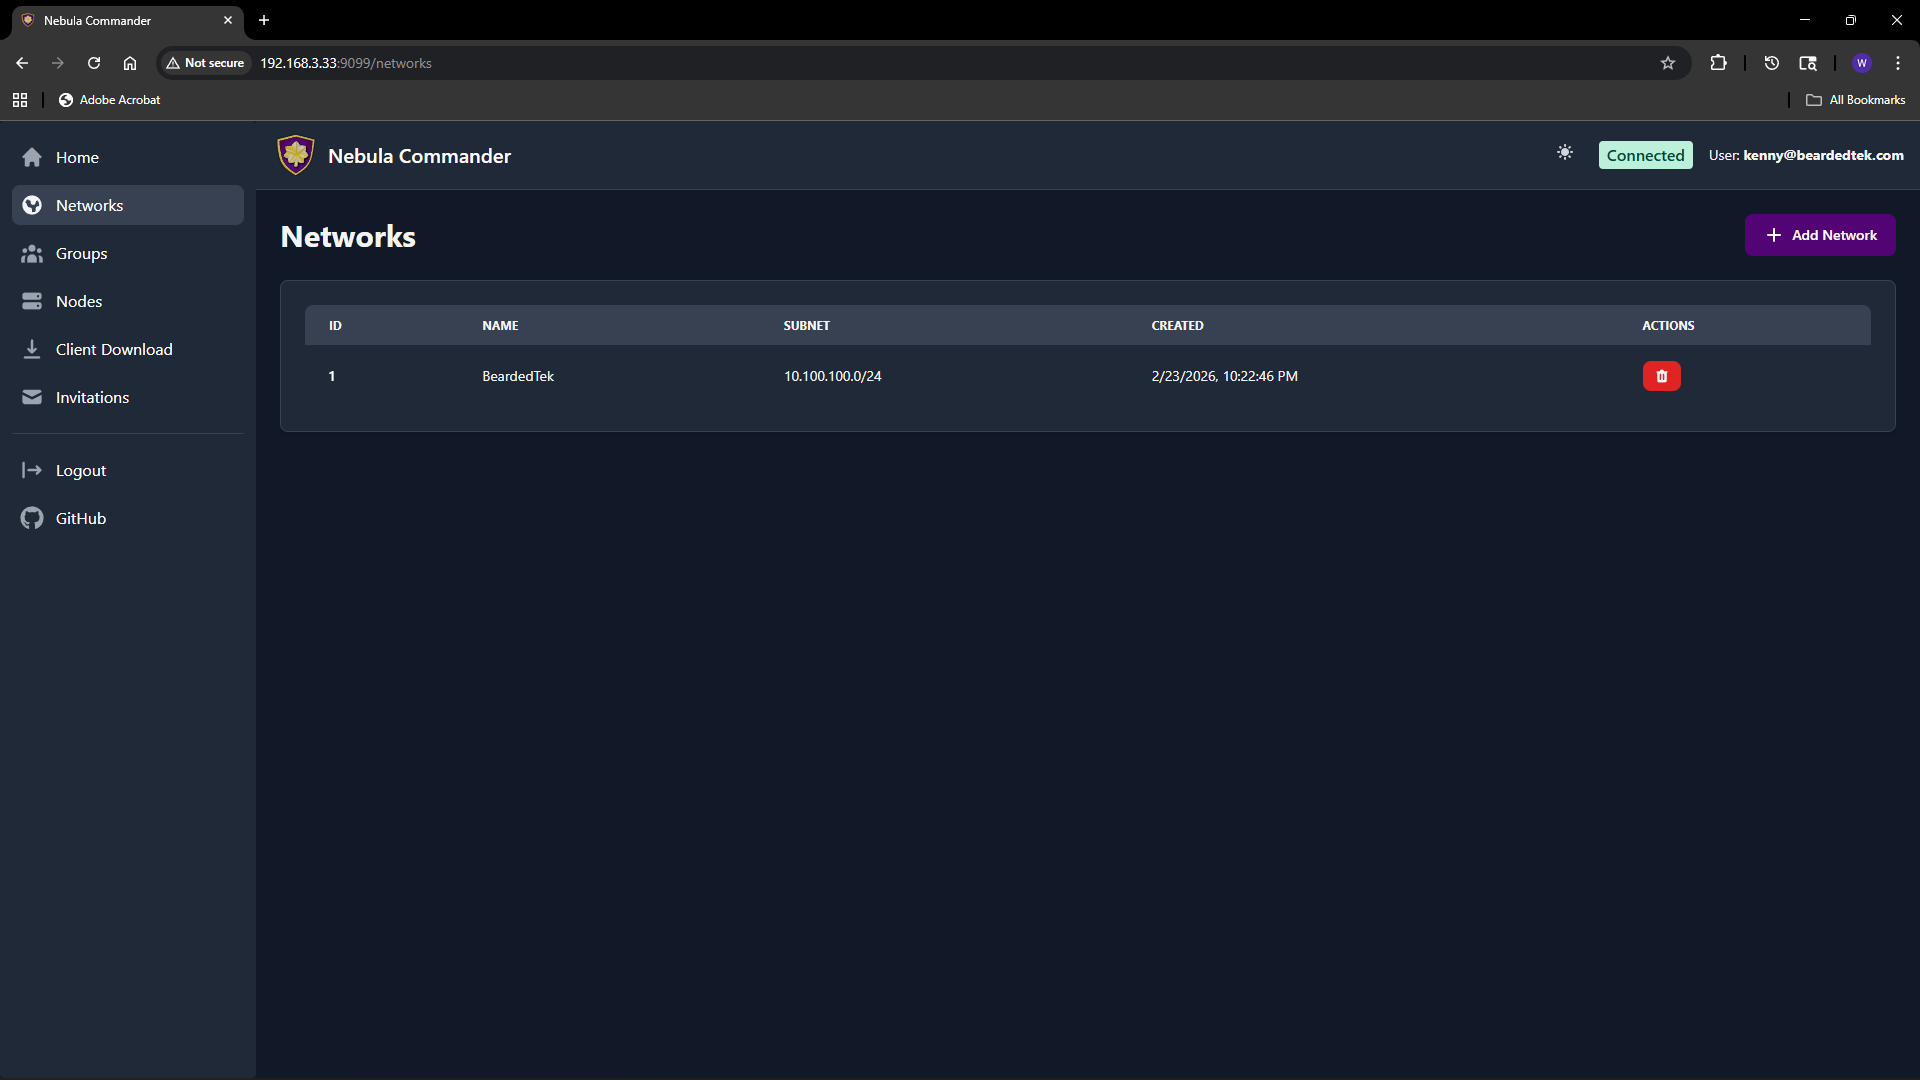 | 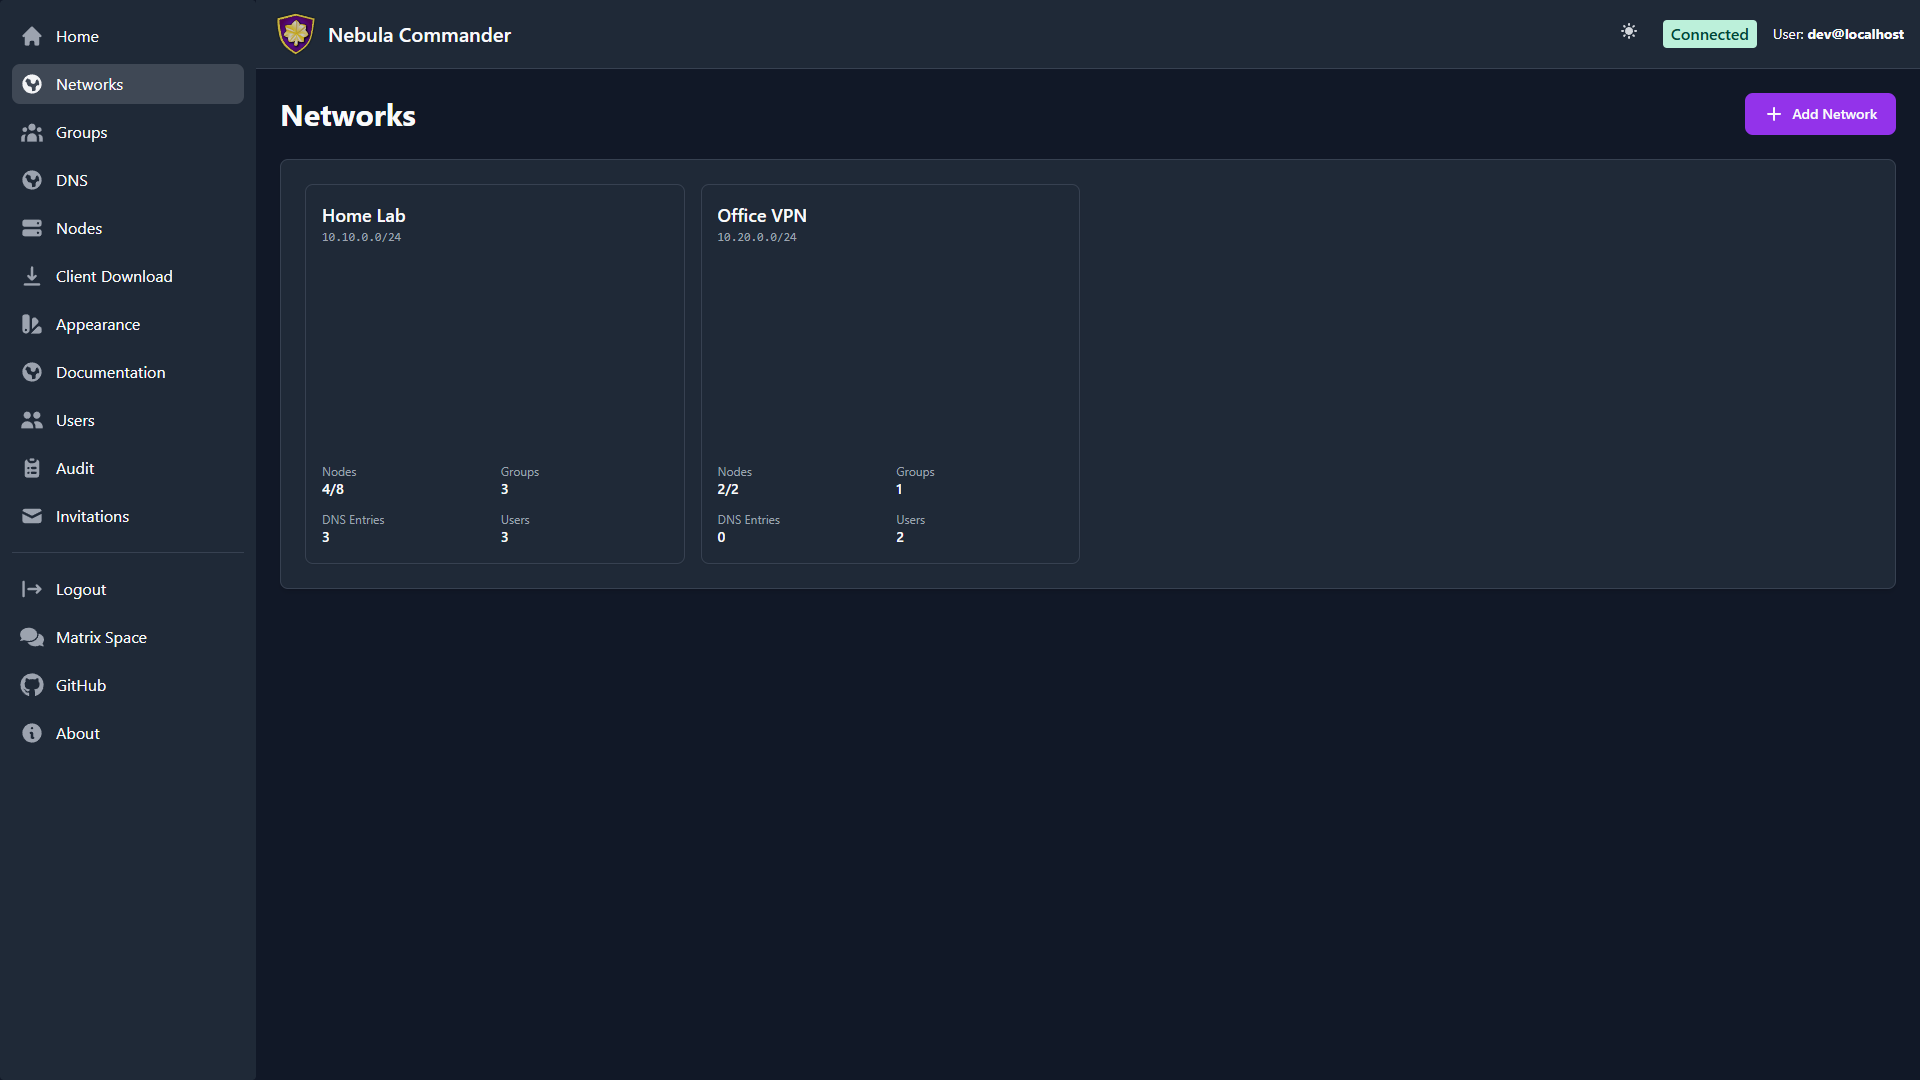 |
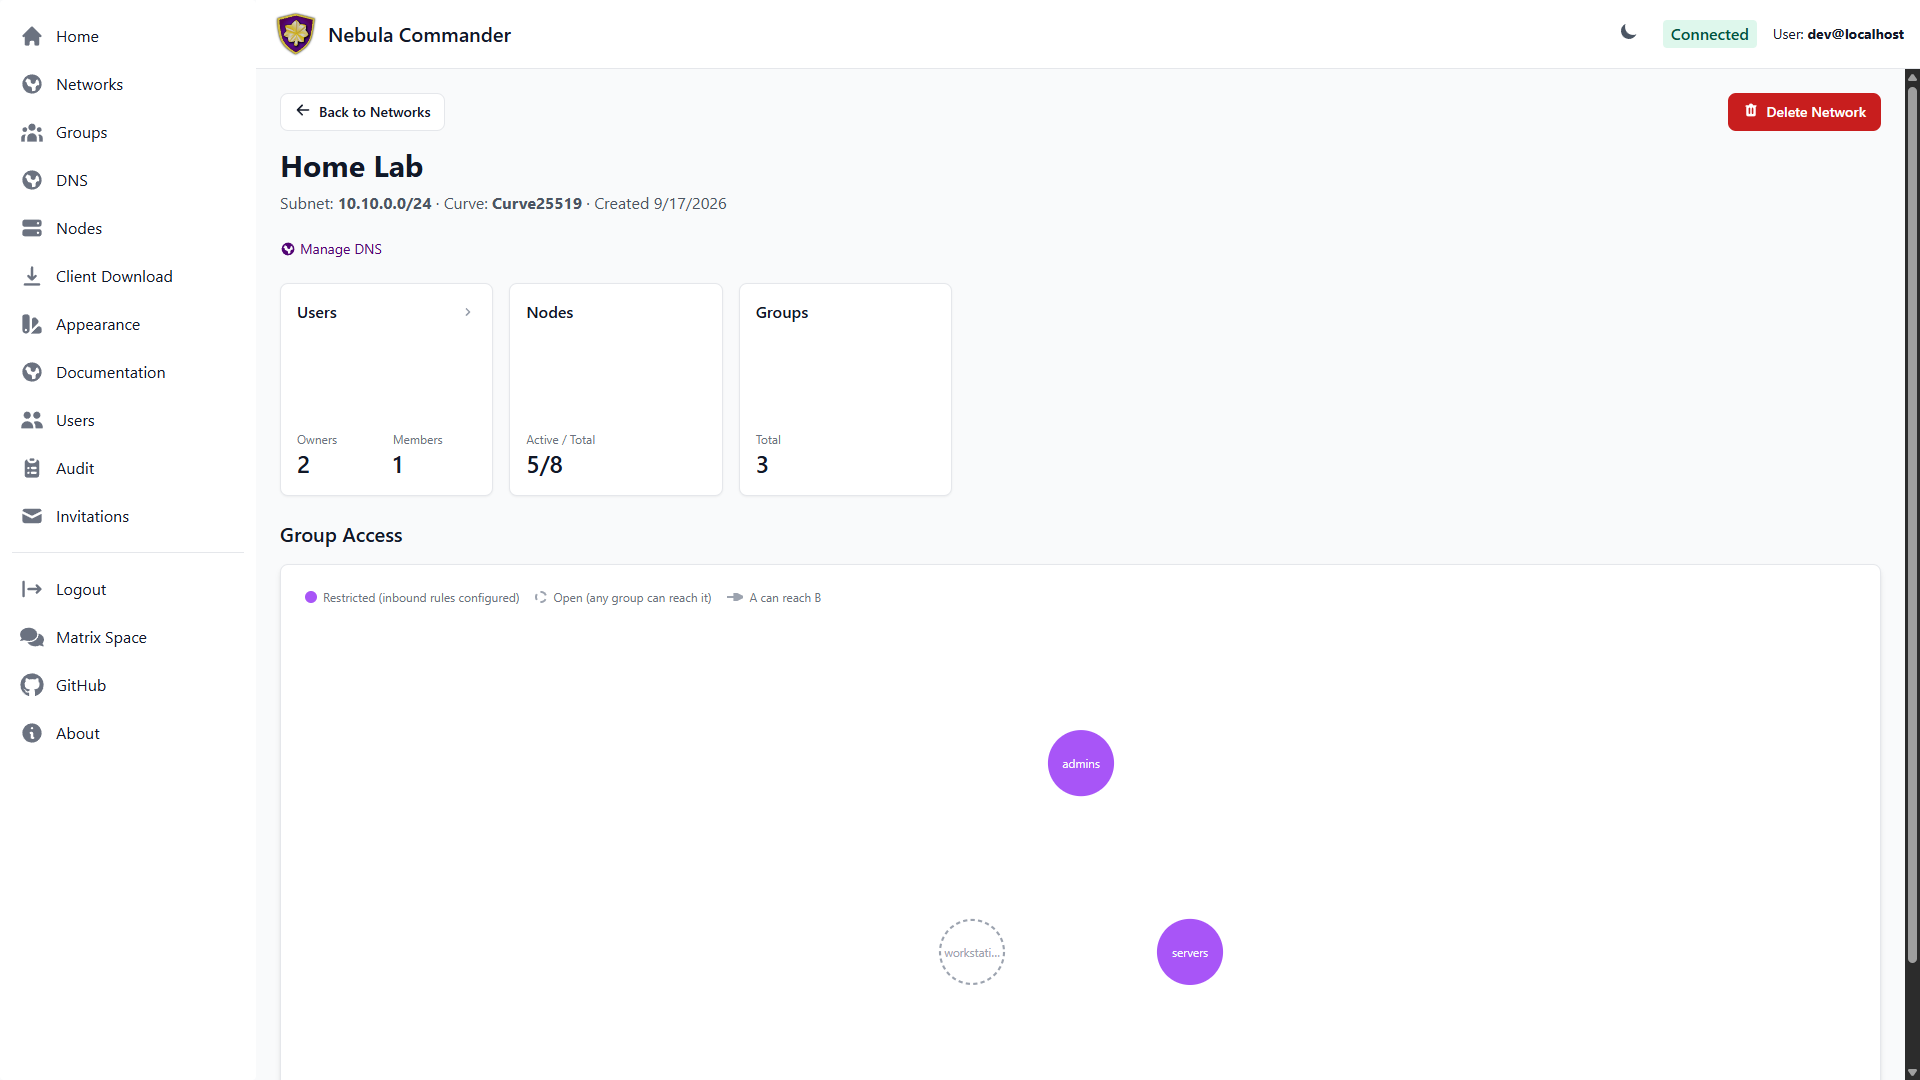
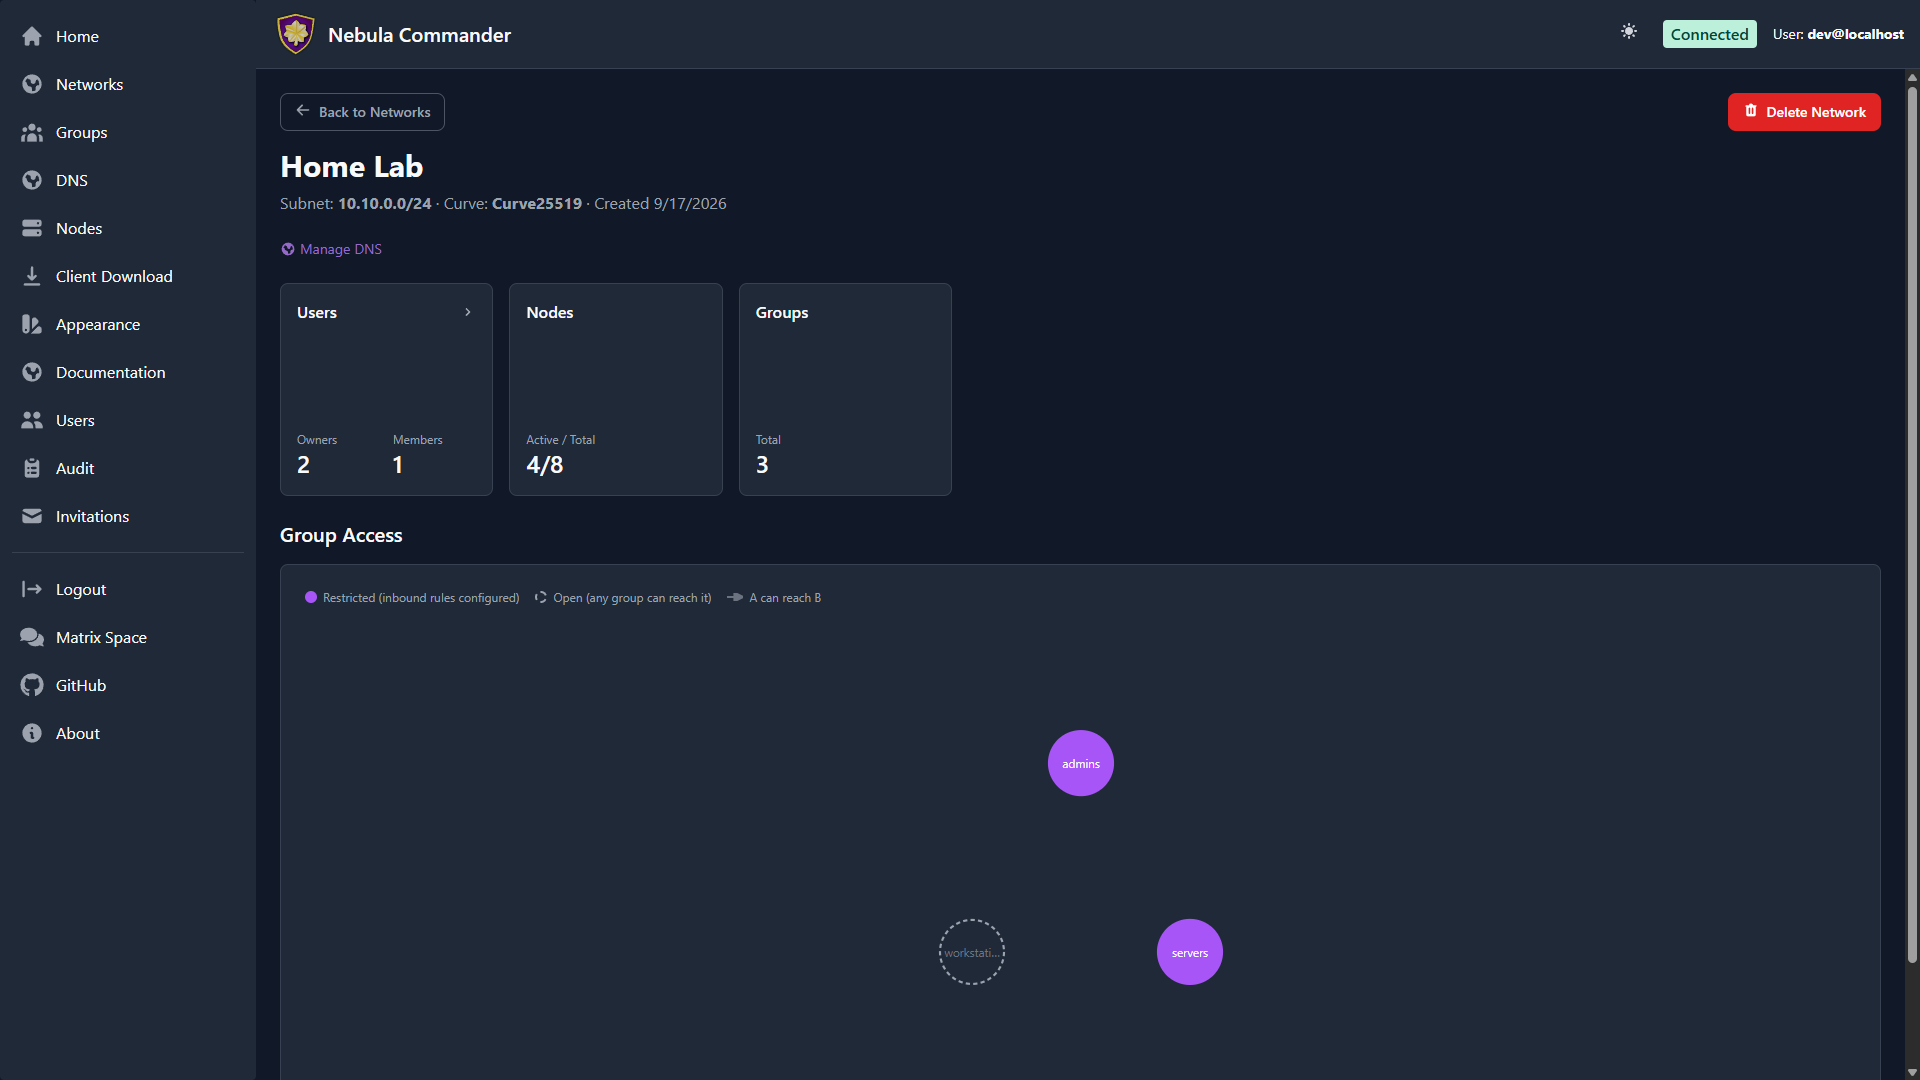
Click a network’s card to open its detail view: node/user/group counts and the Group Access Diagram, a live visualization of which groups can reach which (see Groups for what restricted vs. open means).
| Light | Dark |
|---|---|
 |  |
Adding a new network
- Open Networks in the sidebar.
- Click Add Network.
- Fill in the form:
- Network Name – A label for the network (e.g.
production,home). Must be unique and non-empty. - Subnet CIDR – The IPv4 range for this network. Example:
10.100.0.0/24. Node IPs are assigned from this range. Choose a range that does not overlap with your existing networks or LAN. - Certificate Curve – Curve25519 (default) or P256, opt-in per network. Applies to every node’s certificate on this network and can’t be changed after creation.
- Network Name – A label for the network (e.g.
- Click Create Network. The new network’s card appears in the grid.
You can create multiple networks to separate environments (e.g. dev, staging, prod) or teams.
The network grid
Each card shows the network’s name and subnet CIDR, plus a 2×2 stat grid: Nodes (active/total), Groups, DNS Entries, and Users — all computed server-side, so they’re accurate the instant the page loads. Click a card to open its detail page.
The Home dashboard shows the same card grid for a quick at-a-glance overview across all your networks — the Nodes stat there additionally shows an offline count when any node has gone dark, and the DNS/Groups stats are scoped to what you specifically have permission to see on each network (you’ll see “Restricted” instead of a number on a network where you don’t have that access).
Network detail page
Clicking a network card opens its detail page: three summary cards for Users (owners/members, click to manage — add, edit role, or remove — in place), Nodes (active/total, click to jump to the filtered Nodes page), and Groups (total count, click to jump to the filtered Groups page). Below the summary cards is the Group Access Diagram — a graph of every group on the network, showing which groups can reach which others based on the inbound firewall rules configured on the Groups page. A solid circle means the group has at least one inbound rule configured (“restricted”); a dashed circle means it has none, which under Nebula’s own default means any group can reach it (“open”), not that it’s unreachable.
As a network owner you can also configure DNS (split-horizon domain and aliases) for the network from here.
Deleting a network
Deleting a network is a critical action, moved to the network’s detail page. The UI requires you to reauthenticate before the delete is performed.
- Open the network’s detail page and use the Delete Network action.
- A modal opens asking you to type the network name to confirm.
- Type the exact network name and confirm. You are redirected to the OIDC provider (or dev login) to reauthenticate.
- After reauthentication, you are returned to the UI and the network is deleted.
Ensure no nodes or critical services depend on the network before deleting. Deletion removes the network and its node/certificate data from Nebula Commander.